Trending Article · 23 mins read

Mastering Braiding Techniques for Simple and Stunning Type 4 Hairstyles
Do you fall under the category of naturals who can't style their hair to save their life? 😭 Or are you a Type 4 natural looking for a beginner-friendly guide to braid your own hair?
Maybe you're just looking to learn how to braid type 4 hair protective styles yourself, because let's face it, these hairstylists are not cheap!
Worry no more. In this article we'll show you beginner friendly steps to braid your type 4 hair in protective styles. We've also added links to beginner friendly videos that can help you learn to braid your 4B/4C hair yourself.
Note that these hairstyles, we'd be teaching you will be with your natural hair alone, no added extensions or braid hair.
Let's get started with a list of items you need.
Hairstyling Tools You Need To Master Braiding Your Hair
1. A rat tail comb- The slim, sturdy rat tail comb will help you make even and straight lines as you create parts on your scalp. If the comb is difficult for you, you can use the braid aid adjustable finger parting tool. This hair tool is an absolute must have in your newbie hair tool box.
2. Mirrors- You'll need a mirror to see your head while you make parts, especially the back sections.
Set a mirror in front of you and another behind you; with this arrangement, you can see the back of your head. If you can, get a 3-way mirror; it's the easiest way to get a 360-view of your head.
3. Crocodile clips- These will help you hold the hair sections you are yet to work on in place. Holding the hair section in place will make it easy to braid or style without interruptions.
4. Elastic hair bands or scrunchies- The elastic hair bands can work if you don't have crocodile clips. They can hold your hair in place.
5. Bobby pins- The pins are to tuck in your ends or hold your hair in place.
6. Gel and edge control- These are optional styling tools. If you need that sleek, clean look, you can use gels or edge controls as you style.
You want to make sure your hair is cleanly washed, fresh and moisturized. Braiding protective styles on dirty hair might make it difficult for you.
You don't want to deal with product build-up, or a dirty scalp, or matted hair strands; this might make the process frustrating, and you wouldn't want that.
Now that you have your toolbox complete. Let's get to the braiding styles you can master.
Mastering Braiding Techniques for Type 4B/4C Protective Hairstyles
1. Mastering Halo braids
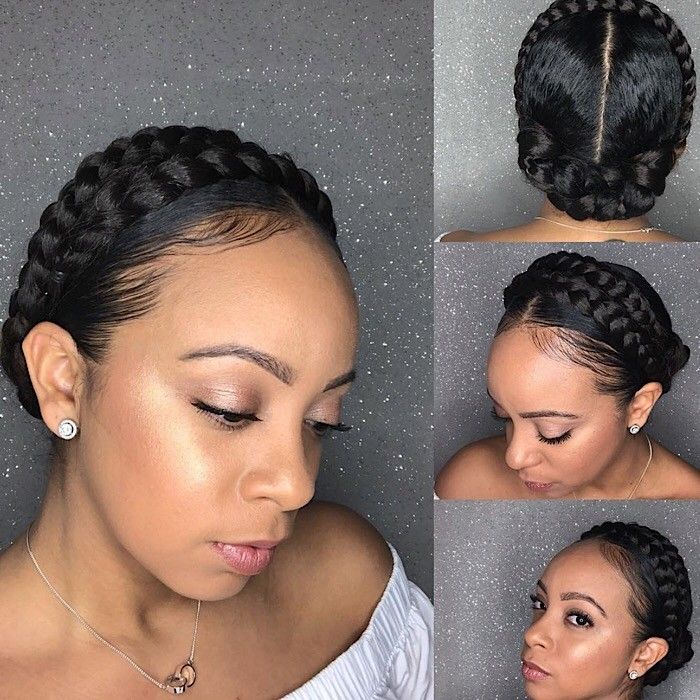
Halo braids are probably the simplest hairstyle you can make with your type 4 hair that takes minutes to achieve.
The beauty of this hairstyle is that you can rock it for any occasion, whether casual or formal. You can make halo braids with flat twists as the compilation video shows.
To make halo braids follow these steps:
Step 1: Part your hair
For this hairstyle, you can make a center part or side part, it's up to you. Just make sure the part is neat in front and visible.
For a center part, use your rattail comb to divide your hair from the middle in two equal sections right down the nape of your neck.
This is to have two even braids on both sides. Once you have done this use an elastic band or crocodile clip to secure one half.
Step 2: Start braiding
On the other section, split the hair into 3 smaller parts of hair and begin to braid as you would cornrows.
Plait all the hair in this section all the way to the tip of your hair, if it becomes too difficult to hold towards the tip, you can make two strand twists as you go or just secure with an elastic band.
Step 3: Repeat on the other side
Take your time, replicate what you did on the first section in the next section. Once you have both sections braided down.
Step 4: Secure braids with a pin
Cross the ends of both sections over and hold them down with a bobby pin.
Fluff out the braids gently for a fuller look. Add edge control to your edges if you like or tie with a satin scarf for a few minutes and you are all done.
If you have short hair, you might like this halo braid styling video by @Mona B. on YouTube.
For midi and long length hair, check out this beginner-friendly halo braids compilation video by @Woch Beautyon Instagram.
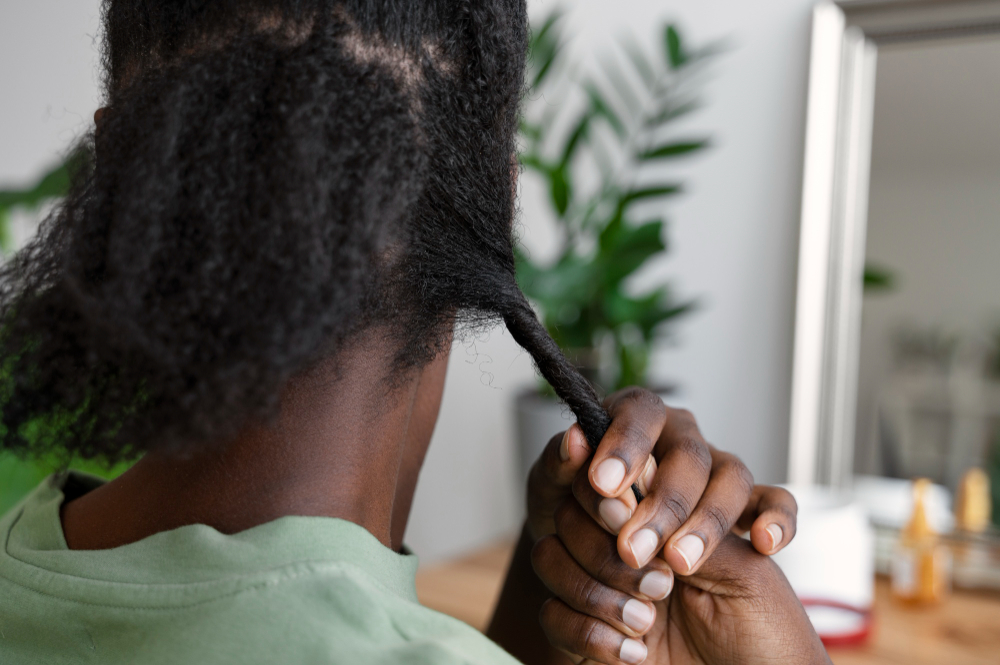
2. Mastering Two-strand twists
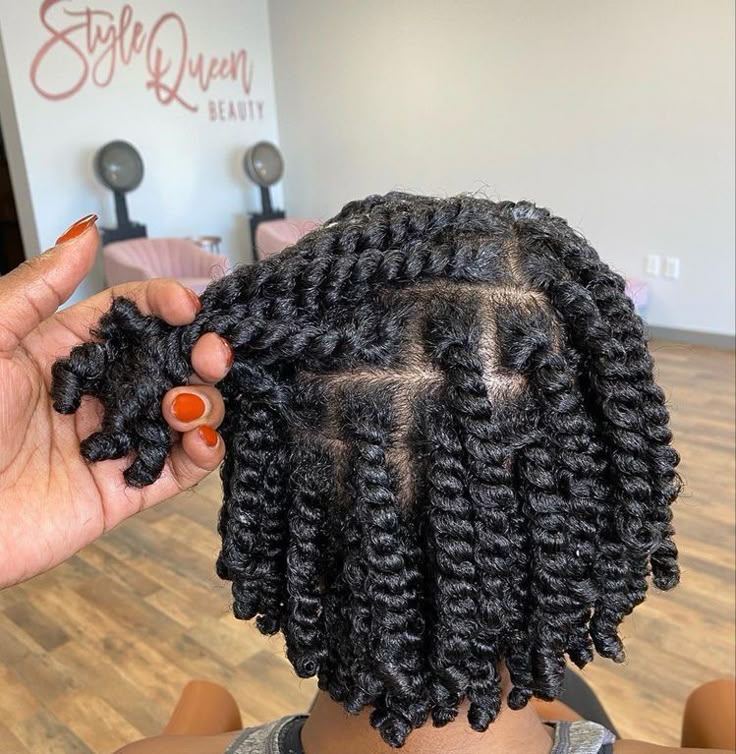
The ultimate go-to protective hairstyle for most natural hair girls. Two-strand twists are very simple yet chic. They can be made in micro, medium or chunky sizes. It depends on your hair density and the purpose of the twist.
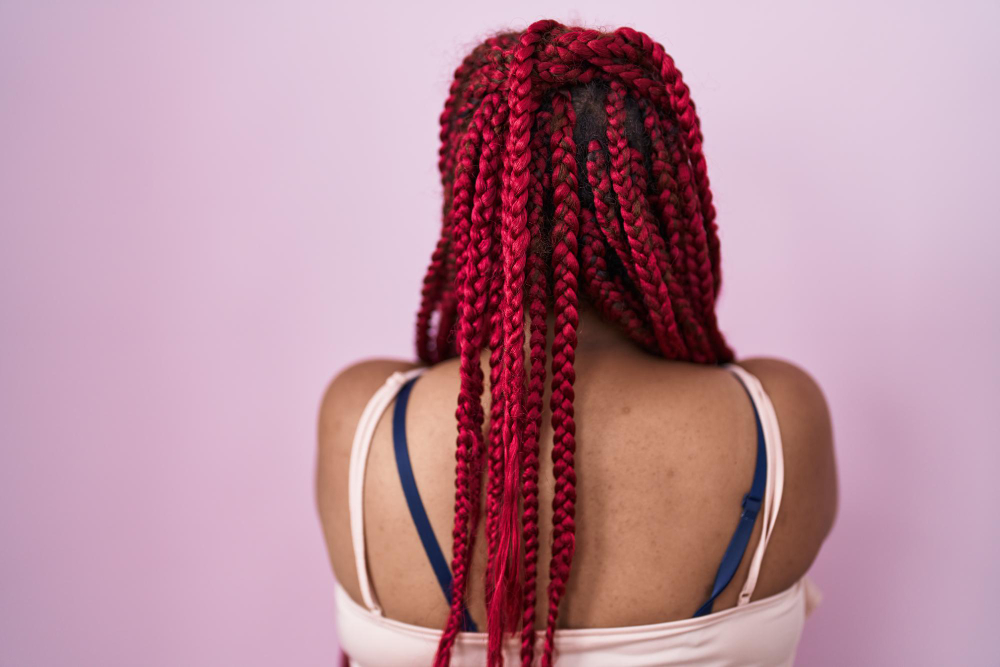
If you want to carry the twist for two weeks or even more, you should consider small or mini twists.
Remember, you need to have added your hair products for moisturization before you start making this hairstyle. You can add a butter, mousse, foam, wrap lotion, curl cream, twist cream or gel to your hair section if you like.
Here is how to make two-strand twists with your natural hair:
Step 1: Part your hair in sections
With your comb part your hair into manageable sections. Depending on the volume of your hair it could be 4, 5 or even 6 sections.
The most important thing is to section your hair in equal and smaller sections so you can twist with ease.
Once that is done, pick one section and secure the rest. At this point you can add your curl cream or styling gel to the section
Step 2: Start Twisting
With your comb make a smaller section and split it into two.
Take one section, cross it over the other section to form a twist. So you can cross from left to right or right to left depending on which is comfortable for you.
Continue in that motion until you get to the tip of your hair. Twirl the tip around your fingers to hold it in place.
Repeat this process all through until you've twisted every section. Congratulations! Your twists are done.
Feel free to add hair accessories to your hair and style as you desire.
Note: If you plan to wear your hair in twists for a week or more, make regular sized twists. If your twists are too big they will unravel quickly.
For short hair, you should see this video by @Tyiece.
To style longer hair, check out this tutorial on YouTube by @Crystal Nicole. It’s a bit long, but you can start at the time stamp 9:47 if you just want to get to the styling.
3. Mastering Flat twists
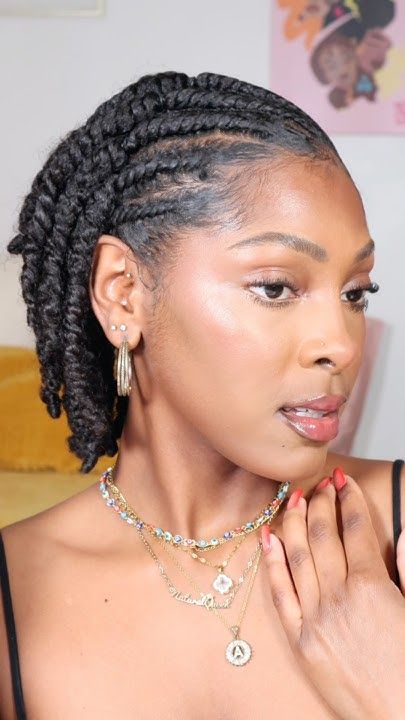
Flat twists are two-strand twists made like cornrows.
Most naturals find it quite tricky to make their hair in flat twists especially if they are used to making their hair in cornrows.
Let's see the step by step method to create flat twists on your hair. Always remember to work on moisturized hair.
Step 1: Section your hair
Create a part from the front of your hair to the back, as you would for cornrows using your comb.
Now, hold off the unsectioned hair with hair bands or crocodile clips.
Step 2: Start flat twisting
At the beginning of the part you're working with, pick out a small section. Split in two like you would a two-strand twist. Try to make this section as even as possible.
Use one twist to cross over the other.
Now, slide your pointer finger into the loose hair section, grab a bit of hair, and add it to the twist you just made.
As you make another twist, pick another section of hair along the part. Gradually repeat this step until you get to the nape of your neck. At this point continue to the tip with two-strand twists. Keep doing this until you have a full head of flat twists.
Great! Your flat twists are done. You can use an edge brush to give your edges that finished look if you want.
This how-to flat twist beginner-friendly video from @Elle Naturalles is the ultimate guide to flat twisting your hair.
4. Mastering braiding Cornrows
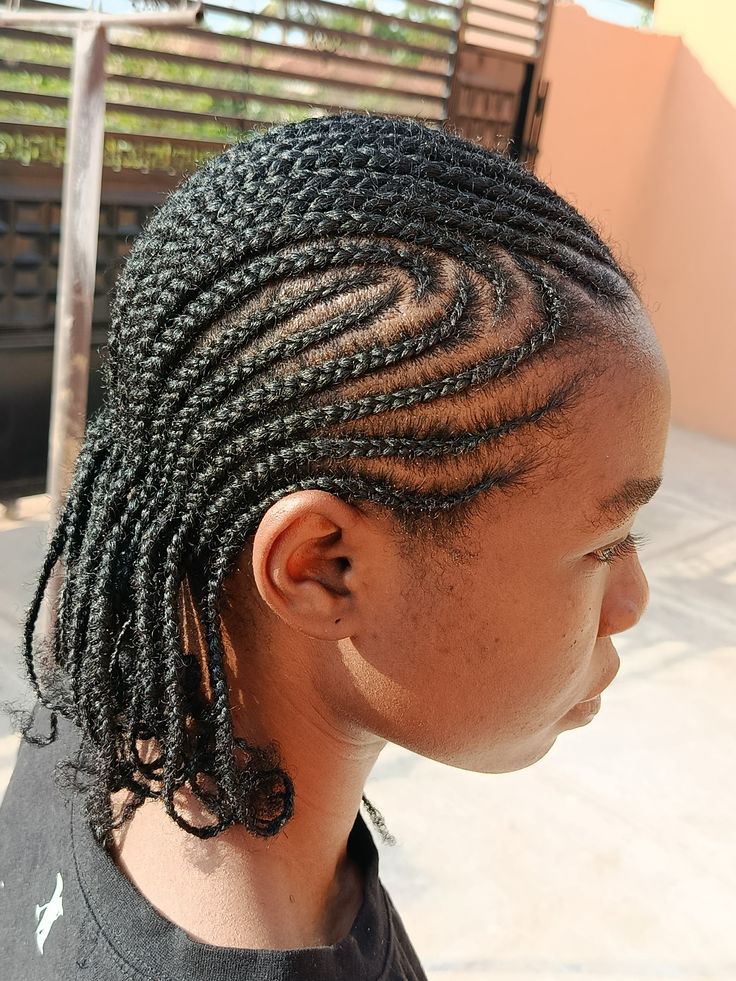
Cornrows are simple, low-maintenance protective styles.
The beauty of cornrows is they can be done in any size, or style. Jumbo cornrows, tiny cornrows, snake cornrows (aka zig-zag) the style possibilities are endless with cornrows.
Making cornrows on your own hair can be quite intimidating because of the desire to get it right and make it perfect. Not to worry with the step by step guide and video on making your hair in cornrows you should be a pro in no time.
Remember to keep your hair moisturized, you don't style with dry hair.
Now, let's get to a beginner-friendly step-by-step guide on how to master braiding cornrows on your hair.
Step 1: Part your hair into a section
Depending on the size of cornrows you want to achieve, part your hair into a section with your comb.
Small parts, make small cornrows and big parts make big cornrows. Use a clip to hold the unsectioned hair out of the way.
Step 2: Create 3 even sections
From the beginning of your hairline make 3 even sections. These mini sections will start the cornrows.
Step 3: Start plaiting
Begin by crossing the center section over to the right. This brings the right to the center. Then, cross the center section to the left, which will form the first plaits that hold it in place.
Now, pick hair, and add it to the left section. Cross the center to the right side, and cross the new center to the left side.
Every time you cross the new center to the left side, pick hair and add it to the left side.
Keep repeating this process, and you'll gradually see the plaits attach to your scalp. Continue down to the length of your hair. Once you are done with this section, part another section until you have a head full of cornrows.
Yay! You did it, cornrows achieved.
Now, don't worry if your first attempt isn't very neat or sleek. The important thing, you tried it and you styled it. With more practice, you'll be a pro.
You should check out this super beginner-friendly video by @Tyeice on how to braid your 4C hair.
5. Mastering Bantu knots
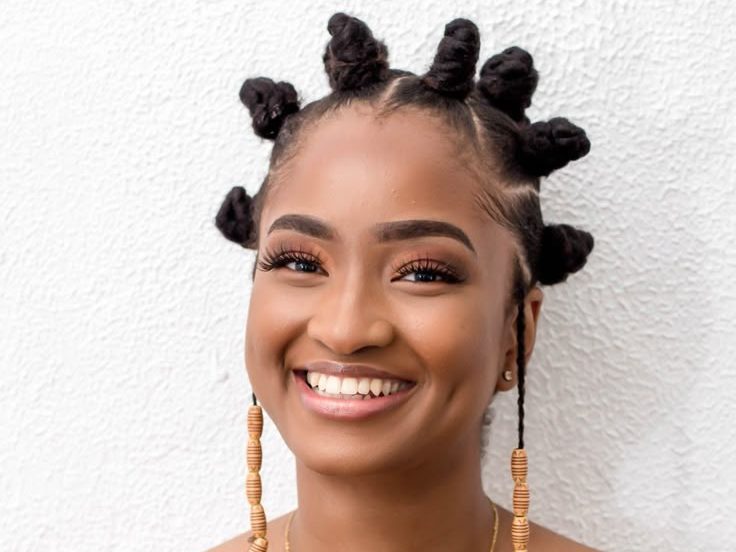
If you are looking to keep your hair protected and make a statement, Bantu knots are your best bet. The beauty of Bantu knots is in the parts, especially if you’re doing big sizes.
If you have short length 4B/4C hair, you can always make your Bantu in smaller sections. Any length of hair can rock this hairstyle, it's quite diverse.
Now, if you want the root of your hair looking sleek and slaying, you might want to pull out your gel for this hairstyle. If you don't want gel in your hair, it's fine just ensure your hair is well moisturized.
For this hairstyle, you'll need small-sized elastic bands or rubber bands to hold down the root of your hair (you can apply oil all over your rubber bands to reduce friction).
Let's get styling:
Step 1: Part your hair
Creating the parts for Bantu knots is the bulk of the work. Getting your hair sections to look good can be a struggle. But not to worry we got you covered. Now, with your rattail comb, part your hair into two halves.
Hold off one section with crocodile clips. On the free section, decide how many knots you want to have on each section, you can make straight line parts, or triangles.
Say you want 5 bantu knots on each section, then make 5 mini sections on your hair as evenly as possible.
Step 2: Make a twist
When you have your mini sections, take one, apply gel to the roots (optional).
Hold the roots and tie your rubber bands firmly but not too tight to prevent too much pressure on the scalp.
Then begin to make two-strand twists, some persons, just hold their hair and twirl without twisting, whichever works for you.
Step 3: Form a knot
After making the two-strand twist. Wrap the twist around the base of your hair, you notice that as your hair goes round it forms a knot.
Try to tuck your ends in as much as you can, some people use rubber bands or pins to secure the bantu knots.
Repeat this step for the entire hair, until you have a hair full of Bantu knots. Feel free to add accessories to your hair.
For medium and long hair bantu knot inspiration check out this video by @Chev. B on YouTube
For short length, this bantu knots tutorial on short hair by @Tyiece on YouTube is a great tutorial.
Wrapping up
Styling your natural hair yourself can be challenging especially because of the expectation to get it right. But take it easy, and one step at a time. Keep trying to get it right, it might take some time but you'll get there.
Always remember to style moisturized hair. Don't tug on your hair or make the hairstyle too tight, to prevent tension on your scalp. We are rooting for you and cheering you on.
Got some tips to share on how you style your hair? We'd love to hear it.
Looking for ladies to cheer you on and support you on this beginner hairstyling journey? We got you! Join The Hair Talk community
How to Care for Your Two-Strand Twist Hairstyle Until Takedown
Jun 25, 2025 · 7 mins read
Protective Hairstyles for Maintaining Healthy Type 4 Hair
Jun 20, 2025 · 14 mins read
Natural Hairstyle Ideas to Rock Everyday on Your Type 4 Crown
Jun 18, 2025 · 22 mins read